

Trigger tasks from inside a run:
Additionally, scheduled tasks get automatically triggered on their schedule and webhooks when receiving a webhook.
Scheduled tasks
You should attach one or more schedules to yourschedules.task() to trigger it on a recurring schedule. Read the scheduled tasks docs.
Authentication
When you trigger a task from your backend code, you need to set theTRIGGER_SECRET_KEY environment variable. You can find the value on the API keys page in the Trigger.dev dashboard. More info on API keys.
Triggering from your backend
You can trigger any task from your backend code using thetasks.trigger() or tasks.batchTrigger() SDK functions.
Do not trigger tasks directly from your frontend. If you do, you will leak your private
Trigger.dev API key.
tasks.trigger()
Triggers a single run of a task with the payload you pass in, and any options you specify, without needing to import the task.By using
tasks.trigger(), you can pass in the task type as a generic argument, giving you full
type checking. Make sure you use a type import so that your task code is not imported into your
application.tasks.batchTrigger()
Triggers multiples runs of a task with the payloads you pass in, and any options you specify, without needing to import the task.By using
tasks.batchTrigger(), you can pass in the task type as a generic argument, giving you
full type checking. Make sure you use a type import so that your task code is not imported into
your application.tasks.triggerAndPoll()
Triggers a single run of a task with the payload you pass in, and any options you specify, and then polls the run until it’s complete.By using
tasks.triggerAndPoll(), you can pass in the task type as a generic argument, giving you
full type checking. Make sure you use a type import so that your task code is not imported into
your application.The above code is just a demonstration of the API and is not recommended to use in an API route
this way as it will block the request until the task is complete.
Triggering from inside a run
Task instance methods are available on theTask object you receive when you define a task. We recommend you use these methods inside another task to trigger subtasks.
yourTask.trigger()
Triggers a single run of a task with the payload you pass in, and any options you specify. It does NOT wait for the result. If called from within a task, you can use theAndWait version to pause execution until the triggered run is complete.
If you need to call trigger() on a task in a loop, use batchTrigger() instead which will trigger up to 100 tasks in a single call.
/trigger/my-task.ts
yourTask.batchTrigger()
Triggers multiples runs of a task with the payloads you pass in, and any options you specify. It does NOT wait for the result./trigger/my-task.ts
yourTask.triggerAndWait()
This is where it gets interesting. You can trigger a task and then wait for the result. This is useful when you need to call a different task and then use the result to continue with your task.Don't use this in parallel, e.g. with `Promise.all()`
Don't use this in parallel, e.g. with `Promise.all()`
Instead, use
batchTriggerAndWait() if you can, or a for loop if you can’t.To control concurrency using batch triggers, you can set queue.concurrencyLimit on the child task./trigger/parent.ts
result object is a “Result” type that needs to be checked to see if the child task run was successful:
/trigger/parent.ts
unwrap method:
/trigger/parent.ts
/trigger/parent.ts
yourTask.batchTriggerAndWait()
You can batch trigger a task and wait for all the results. This is useful for the fan-out pattern, where you need to call a task multiple times and then wait for all the results to continue with your task.Don't use this in parallel, e.g. with `Promise.all()`
Don't use this in parallel, e.g. with `Promise.all()`
Instead, pass in all items at once and set an appropriate
maxConcurrency. Alternatively, use sequentially with a for loop.To control concurrency, you can set queue.concurrencyLimit on the child task.How to handle run failures
How to handle run failures
When using
batchTriggerAndWait, you have full control over how to handle failures within the batch. The method returns an array of run results, allowing you to inspect each run’s outcome individually and implement custom error handling.Here’s how you can manage run failures:-
Inspect individual run results: Each run in the returned array has an
okproperty indicating success or failure. -
Access error information: For failed runs, you can examine the
errorproperty to get details about the failure. -
Choose your failure strategy: You have two main options:
- Fail the entire batch: Throw an error if any run fails, causing the parent task to reattempt.
- Continue despite failures: Process the results without throwing an error, allowing the parent task to continue.
- Implement custom logic: You can create sophisticated handling based on the number of failures, types of errors, or other criteria.
/trigger/nested.ts
Options
All of the above functions accept an options object:delay
When you want to trigger a task now, but have it run at a later time, you can use the delay option:

Delayed runs will be enqueued at the time specified, and will run as soon as possible after that
time, just as a normally triggered run would.
runs.cancel SDK function:
runs.reschedule SDK function:
delay option is also available when using batchTrigger:
ttl
You can set a TTL (time to live) when triggering a task, which will automatically expire the run if it hasn’t started within the specified time. This is useful for ensuring that a run doesn’t get stuck in the queue for too long.
All runs in development have a default
ttl of 10 minutes. You can disable this by setting the
ttl option.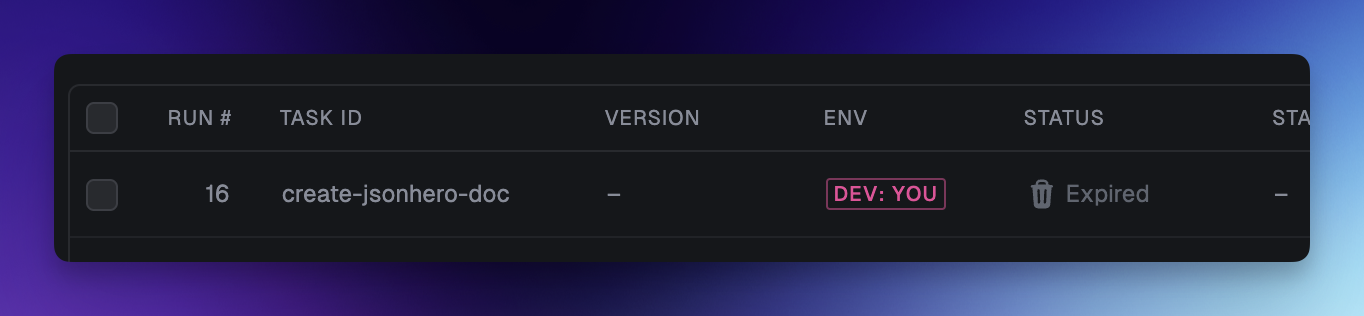
delay and ttl, the TTL will start counting down from the time the run is enqueued, not from the time the run is triggered.
So for example, when using the following code:
- The run is created at 12:00:00
- The run is enqueued at 12:10:00
- The TTL starts counting down from 12:10:00
- If the run hasn’t started by 13:10:00, it will be expired
ttl option only accepts durations and not absolute timestamps.
idempotencyKey
You can provide an idempotencyKey to ensure that a task is only triggered once with the same key. This is useful if you are triggering a task within another task that might be retried:
queue
When you trigger a task you can override the concurrency limit. This is really useful if you sometimes have high priority runs.
The task:
/trigger/override-concurrency.ts
app/api/push/route.ts
concurrencyKey
If you’re building an application where you want to run tasks for your users, you might want a separate queue for each of your users. (It doesn’t have to be users, it can be any entity you want to separately limit the concurrency for.)
You can do this by using concurrencyKey. It creates a separate queue for each value of the key.
Your backend code:
app/api/pr/route.ts
maxAttempts
You can set the maximum number of attempts for a task run. If the run fails, it will be retried up to the number of attempts you specify.
retry.maxAttempts value set in the task definition.
Large Payloads
We recommend keeping your task payloads as small as possible. We currently have a hard limit on task payloads above 10MB. If your payload size is larger than 512KB, instead of saving the payload to the database, we will upload it to an S3-compatible object store and store the URL in the database. When your task runs, we automatically download the payload from the object store and pass it to your task function. We also will return to you apayloadPresignedUrl from the runs.retrieve SDK function so you can download the payload if needed:
We also use this same system for dealing with large task outputs, and subsequently will return a
corresponding
outputPresignedUrl. Task outputs are limited to 100MB.Batch Triggering
When usingbatchTrigger or batchTriggerAndWait, the total size of all payloads cannot exceed 10MB. This means if you are doing a batch of 100 runs, each payload should be less than 100KB.