> ## Documentation Index
> Fetch the complete documentation index at: https://trigger-docs-build-extensions.mintlify.site/llms.txt
> Use this file to discover all available pages before exploring further.
# Quick start
> How to get started in 3 minutes using the CLI and SDK.
In this guide we will:
1. Create a `trigger.config.ts` file and a `/trigger` directory with an example task.
2. Get you to run the task using the CLI.
3. Show you how to view the run logs for that task.
You can either:
* Use the [Trigger.dev Cloud](https://cloud.trigger.dev).
* Or [self-host](/open-source-self-hosting) the service.
Once you've created an account, follow the steps in the app to:
1. Complete your account details.
2. Create your first Organization and Project.
The easiest way to get started is to use the CLI. It will add Trigger.dev to your existing project, create a `/trigger` folder and give you an example task.
Run this command in the root of your project to get started:
```bash npm theme={null}
npx trigger.dev@latest init
```
```bash pnpm theme={null}
pnpm dlx trigger.dev@latest init
```
```bash yarn theme={null}
yarn dlx trigger.dev@latest init
```
It will do a few things:
1. Log you into the CLI if you're not already logged in.
2. Create a `trigger.config.ts` file in the root of your project.
3. Ask where you'd like to create the `/trigger` directory.
4. Create the `/trigger` directory with an example task, `/trigger/example.[ts/js]`.
Install the "Hello World" example task when prompted. We'll use this task to test the setup.
The CLI `dev` command runs a server for your tasks. It watches for changes in your `/trigger` directory and communicates with the Trigger.dev platform to register your tasks, perform runs, and send data back and forth.
It can also update your `@trigger.dev/*` packages to prevent version mismatches and failed deploys. You will always be prompted first.
```bash npm theme={null}
npx trigger.dev@latest dev
```
```bash pnpm theme={null}
pnpm dlx trigger.dev@latest dev
```
```bash yarn theme={null}
yarn dlx trigger.dev@latest dev
```
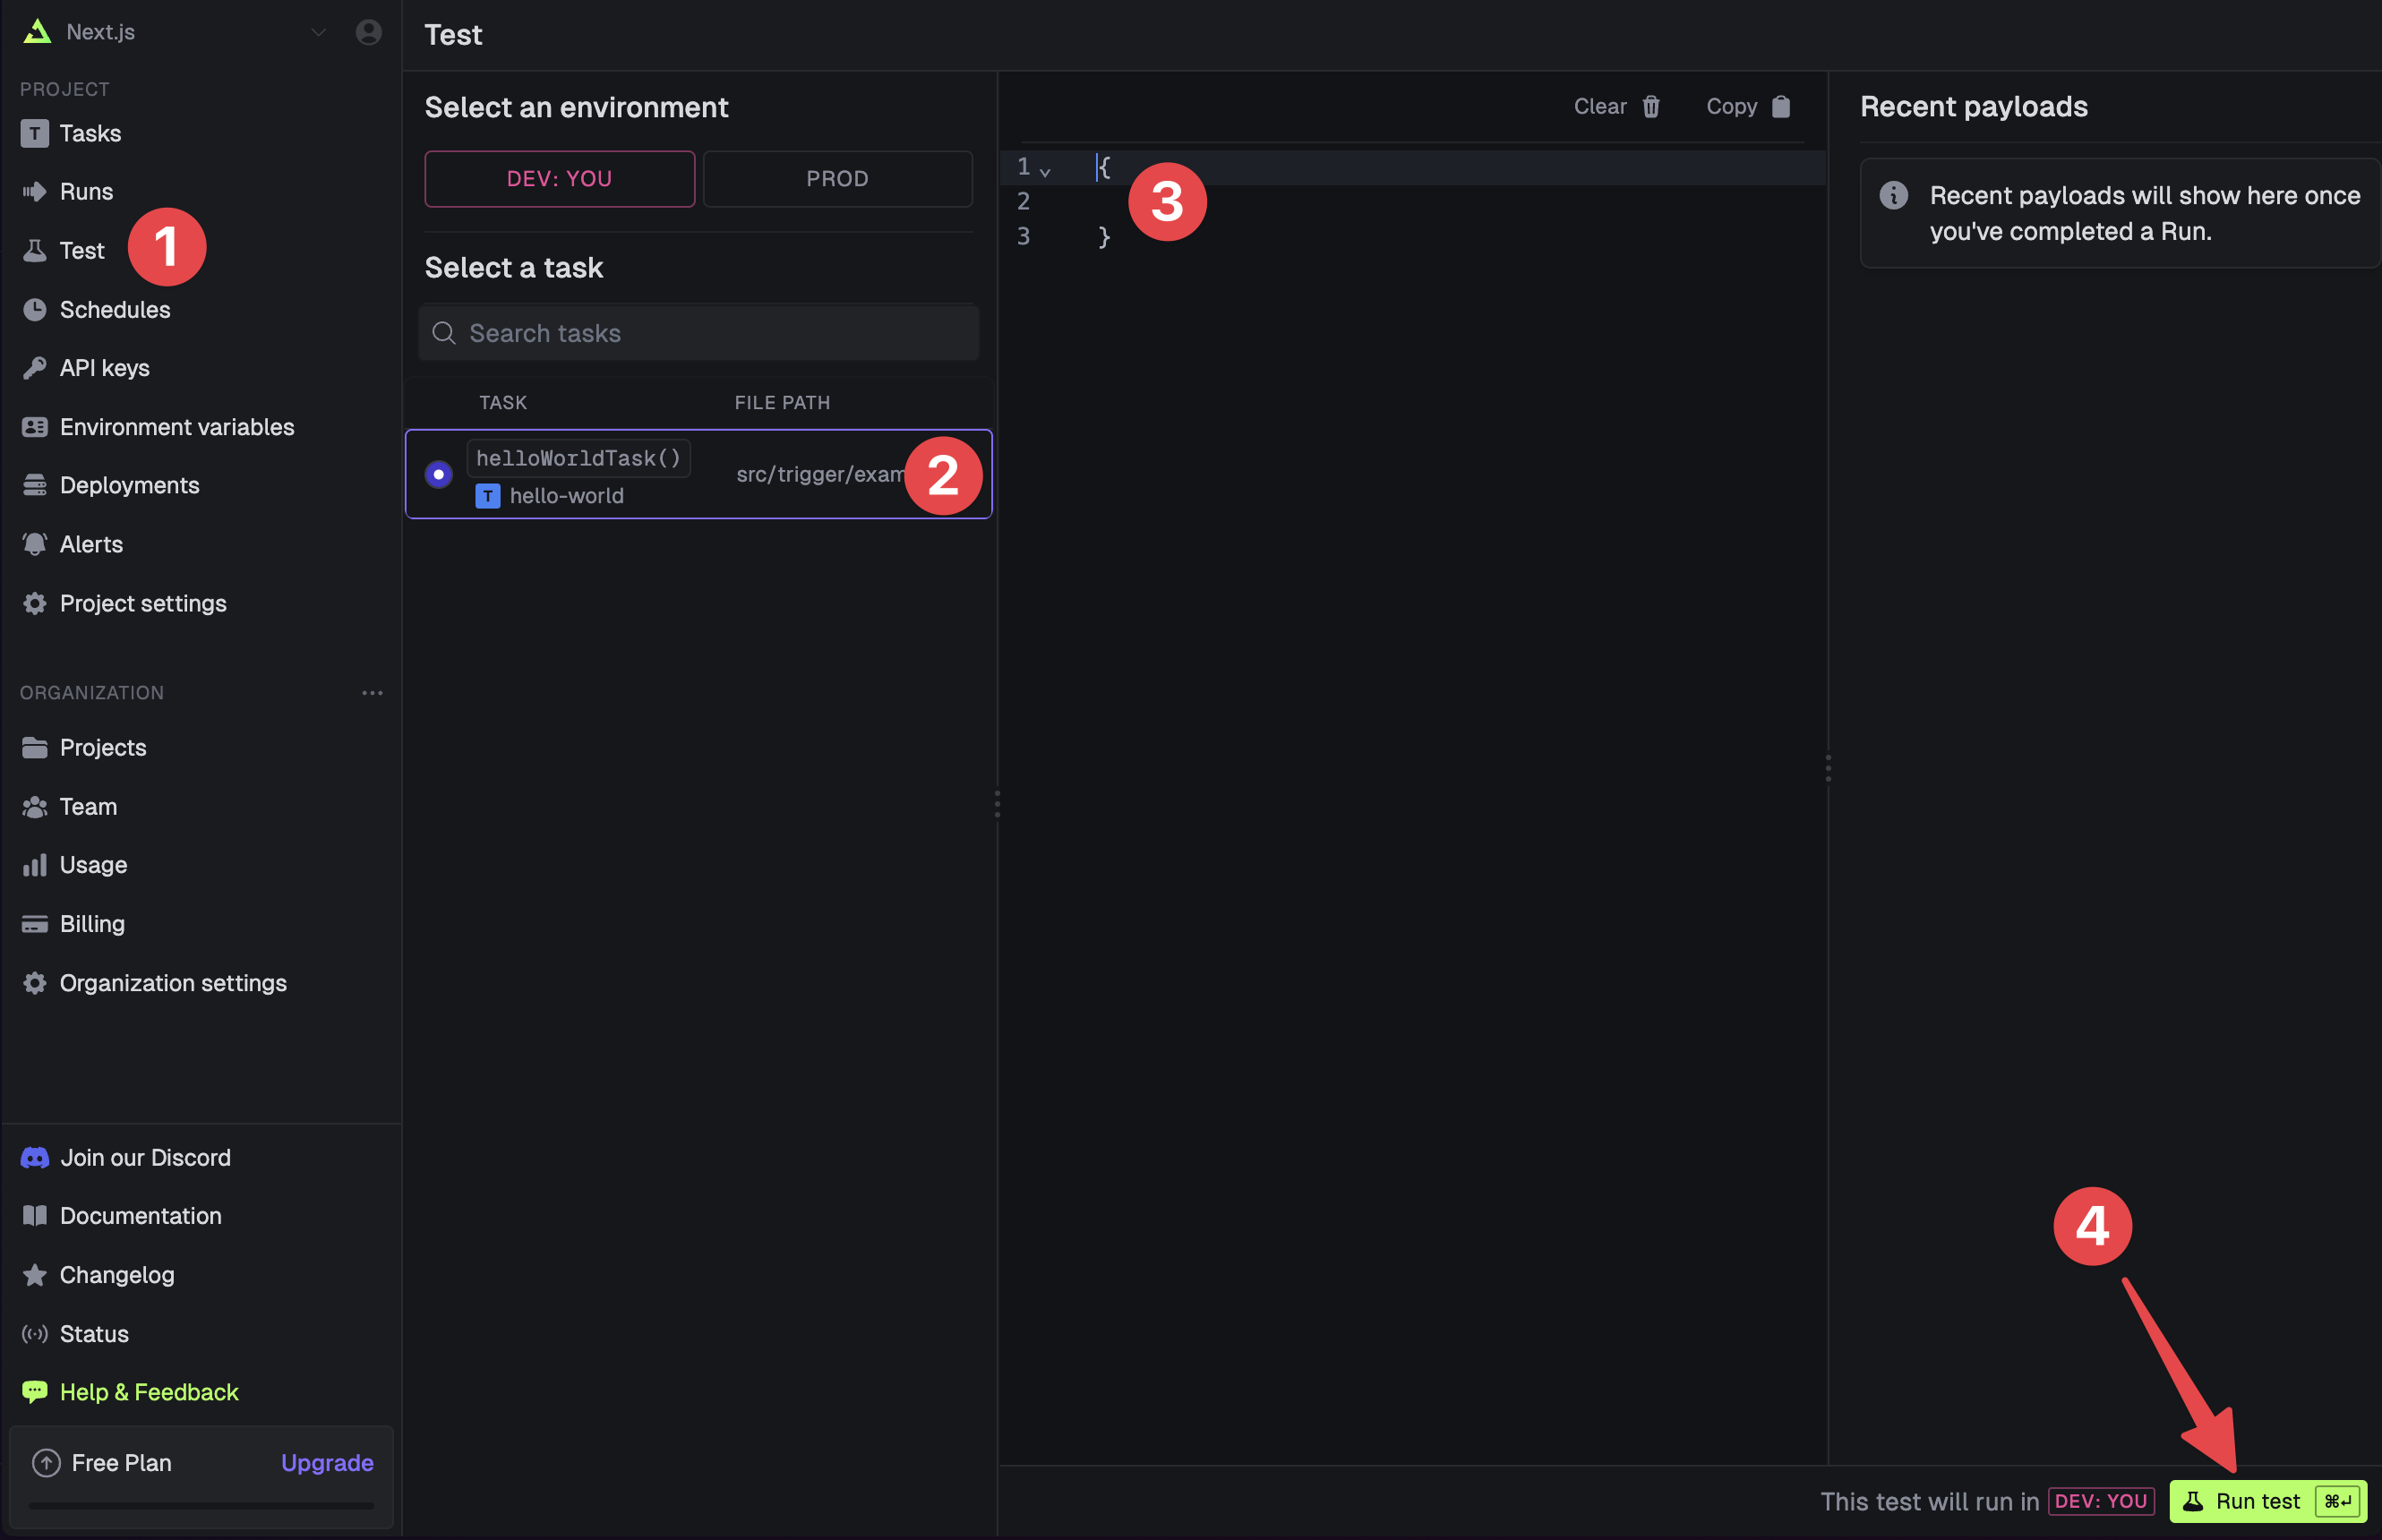
The CLI `dev` command spits out various useful URLs. Right now we want to visit the Test page .
You should see our Example task in the list , select it. Most tasks have a "payload" which you enter in the JSON editor , but our example task doesn't need any input.
Press the "Run test" button .
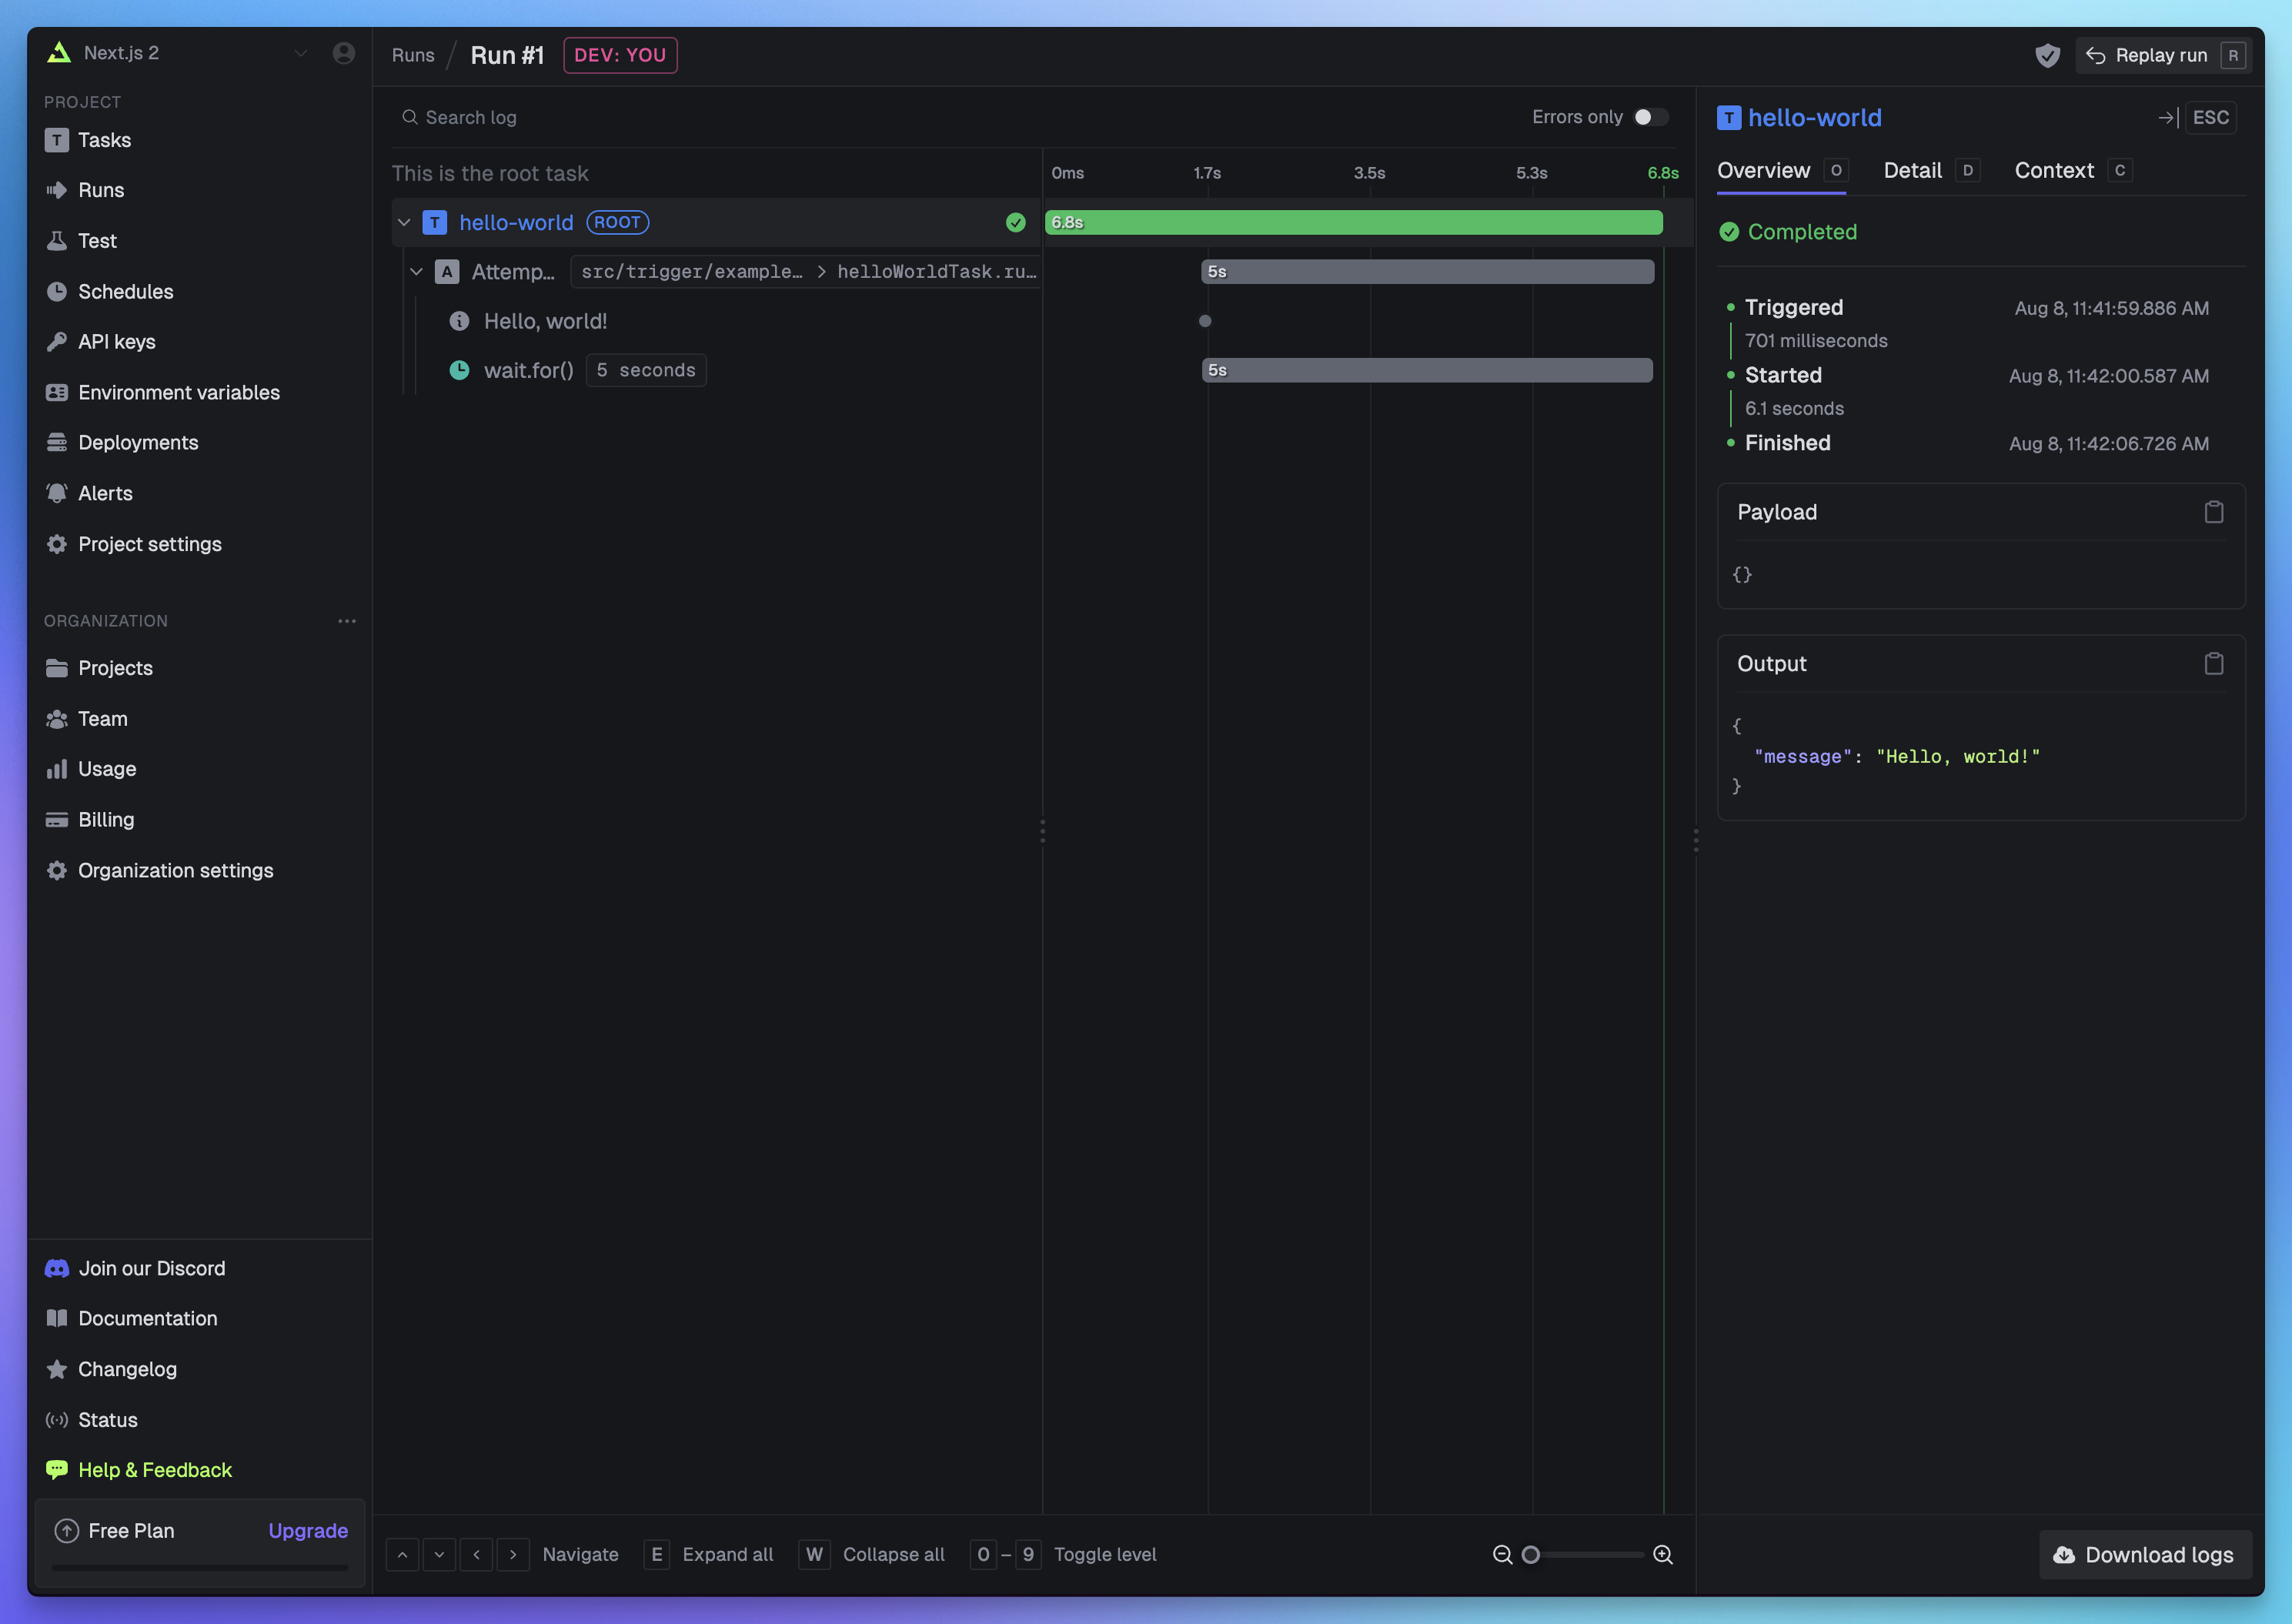
 Congratulations, you should see the run page which will live reload showing you the current state of the run.
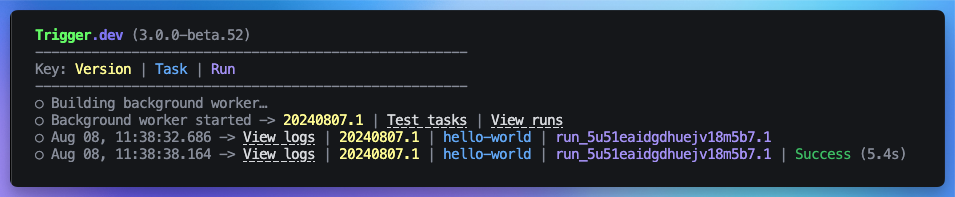
 If you go back to your terminal you'll see that the dev command also shows the task status and links to the run log.
 ## Next steps
Learn how to trigger tasks from your code.
Tasks are the core of Trigger.dev. Learn what they are and how to write them.
## Next steps
Learn how to trigger tasks from your code.
Tasks are the core of Trigger.dev. Learn what they are and how to write them.